从零开始做第一个scrapy 框架爬虫
首先确保自己的电脑已经安装好scrapy,如果还没有安装好请自行百度一下,很简单。
1.项目创建
创建项目 :scrapy startproject myjira

创建 spider,首先进入目标spiders文件夹
cd spiders
scrapy genspider myjira_spider 'jira.lp.com'
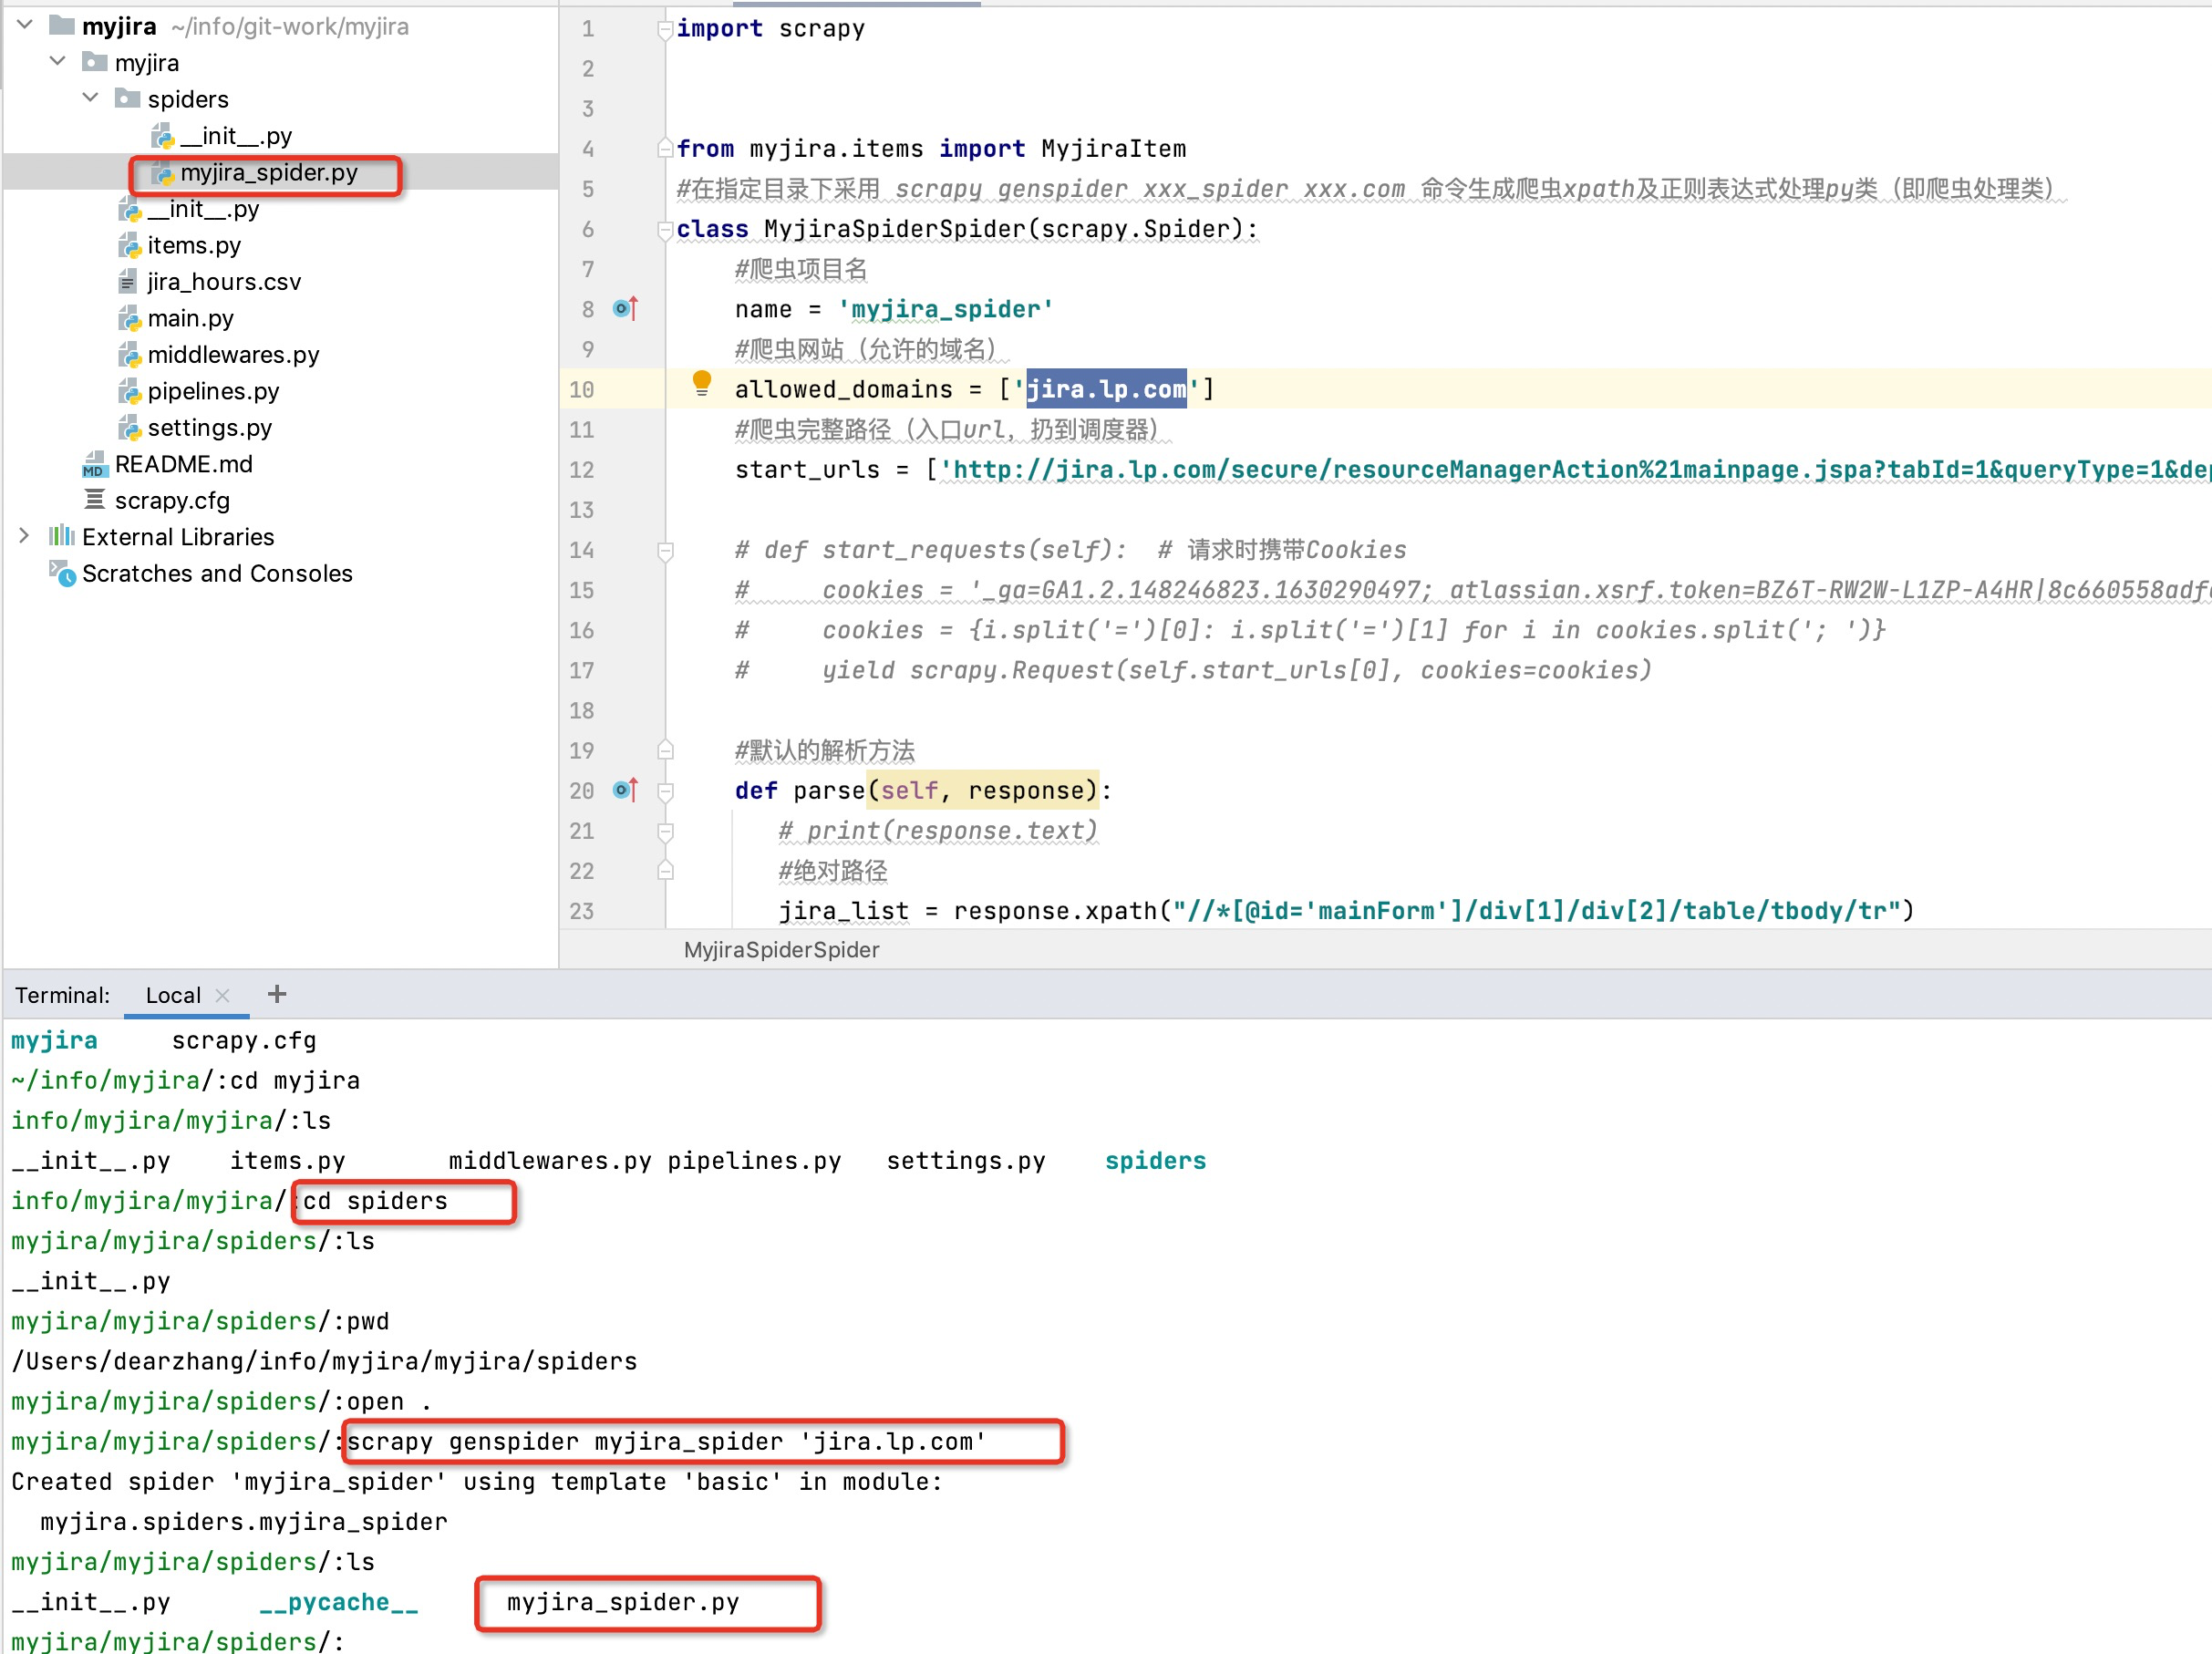
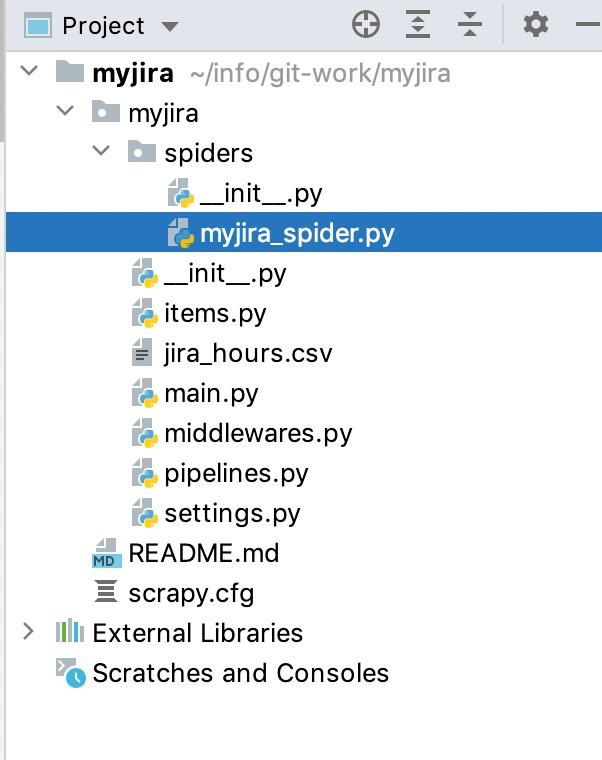
项目创建完成后的结构目录是这样的
2.编写scrapy 爬虫项目
2.1 编写items.py
这里是我们想要采集的数据字段
import scrapy

class MyjiraItem(scrapy.Item):
    # define the fields for your item here like:
    name = scrapy.Field()
    role = scrapy.Field()
    hours = scrapy.Field()
    all = scrapy.Field()
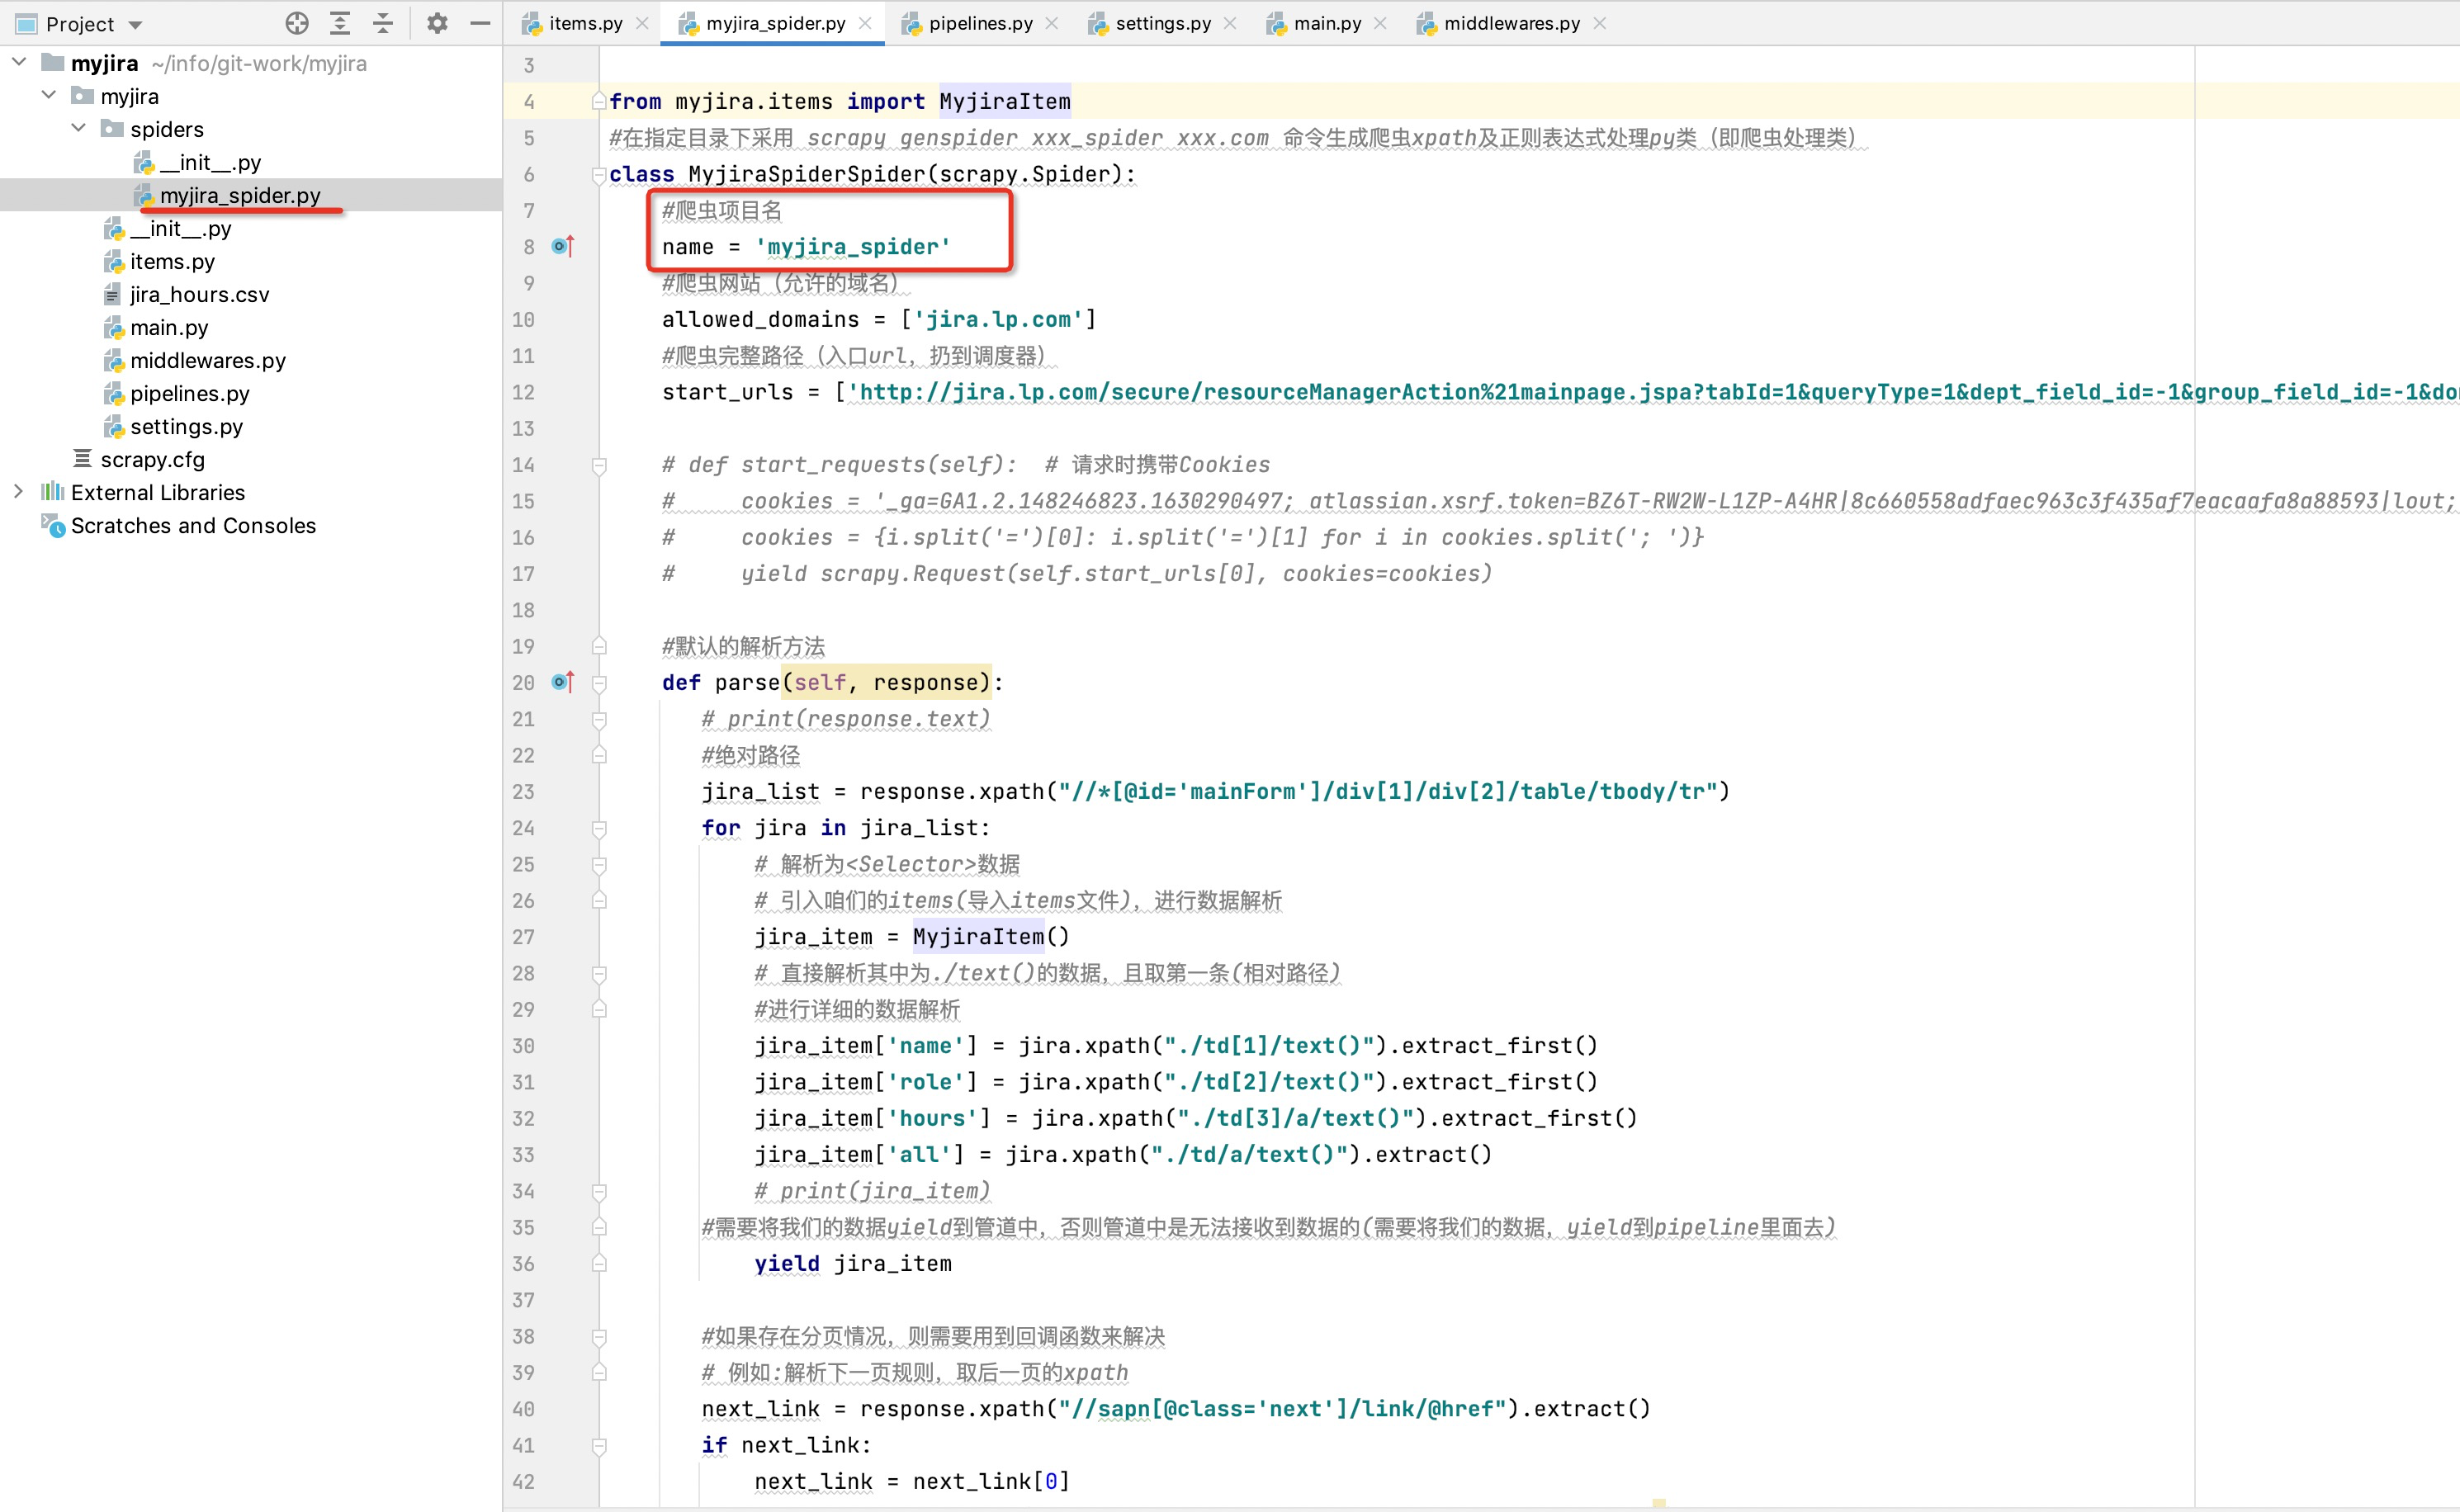
2.2 spiders下的 myjira_sppider.py 文件
这里是我们写爬虫的主要实现逻辑
import scrapy
from myjira.items import MyjiraItem
#在指定目录下采用 scrapy genspider xxx_spider xxx.com 命令生成爬虫xpath及正则表达式处理py类(即爬虫处理类)
class MyjiraSpiderSpider(scrapy.Spider):
#爬虫项目名
name = 'myjira_spider'
#爬虫网站(允许的域名)
allowed_domains = ['jira.lp.com']
#爬虫完整路径(入口url,扔到调度器)
start_urls = ['http://jira.lp.com/secure/resourceManagerAction%21mainpage.jspa?tabId=1&queryType=1&dept_field_id=-1&group_field_id=-1&domain_field_id=-1&begintime=2022-02-14&endtime=2022-02-20']
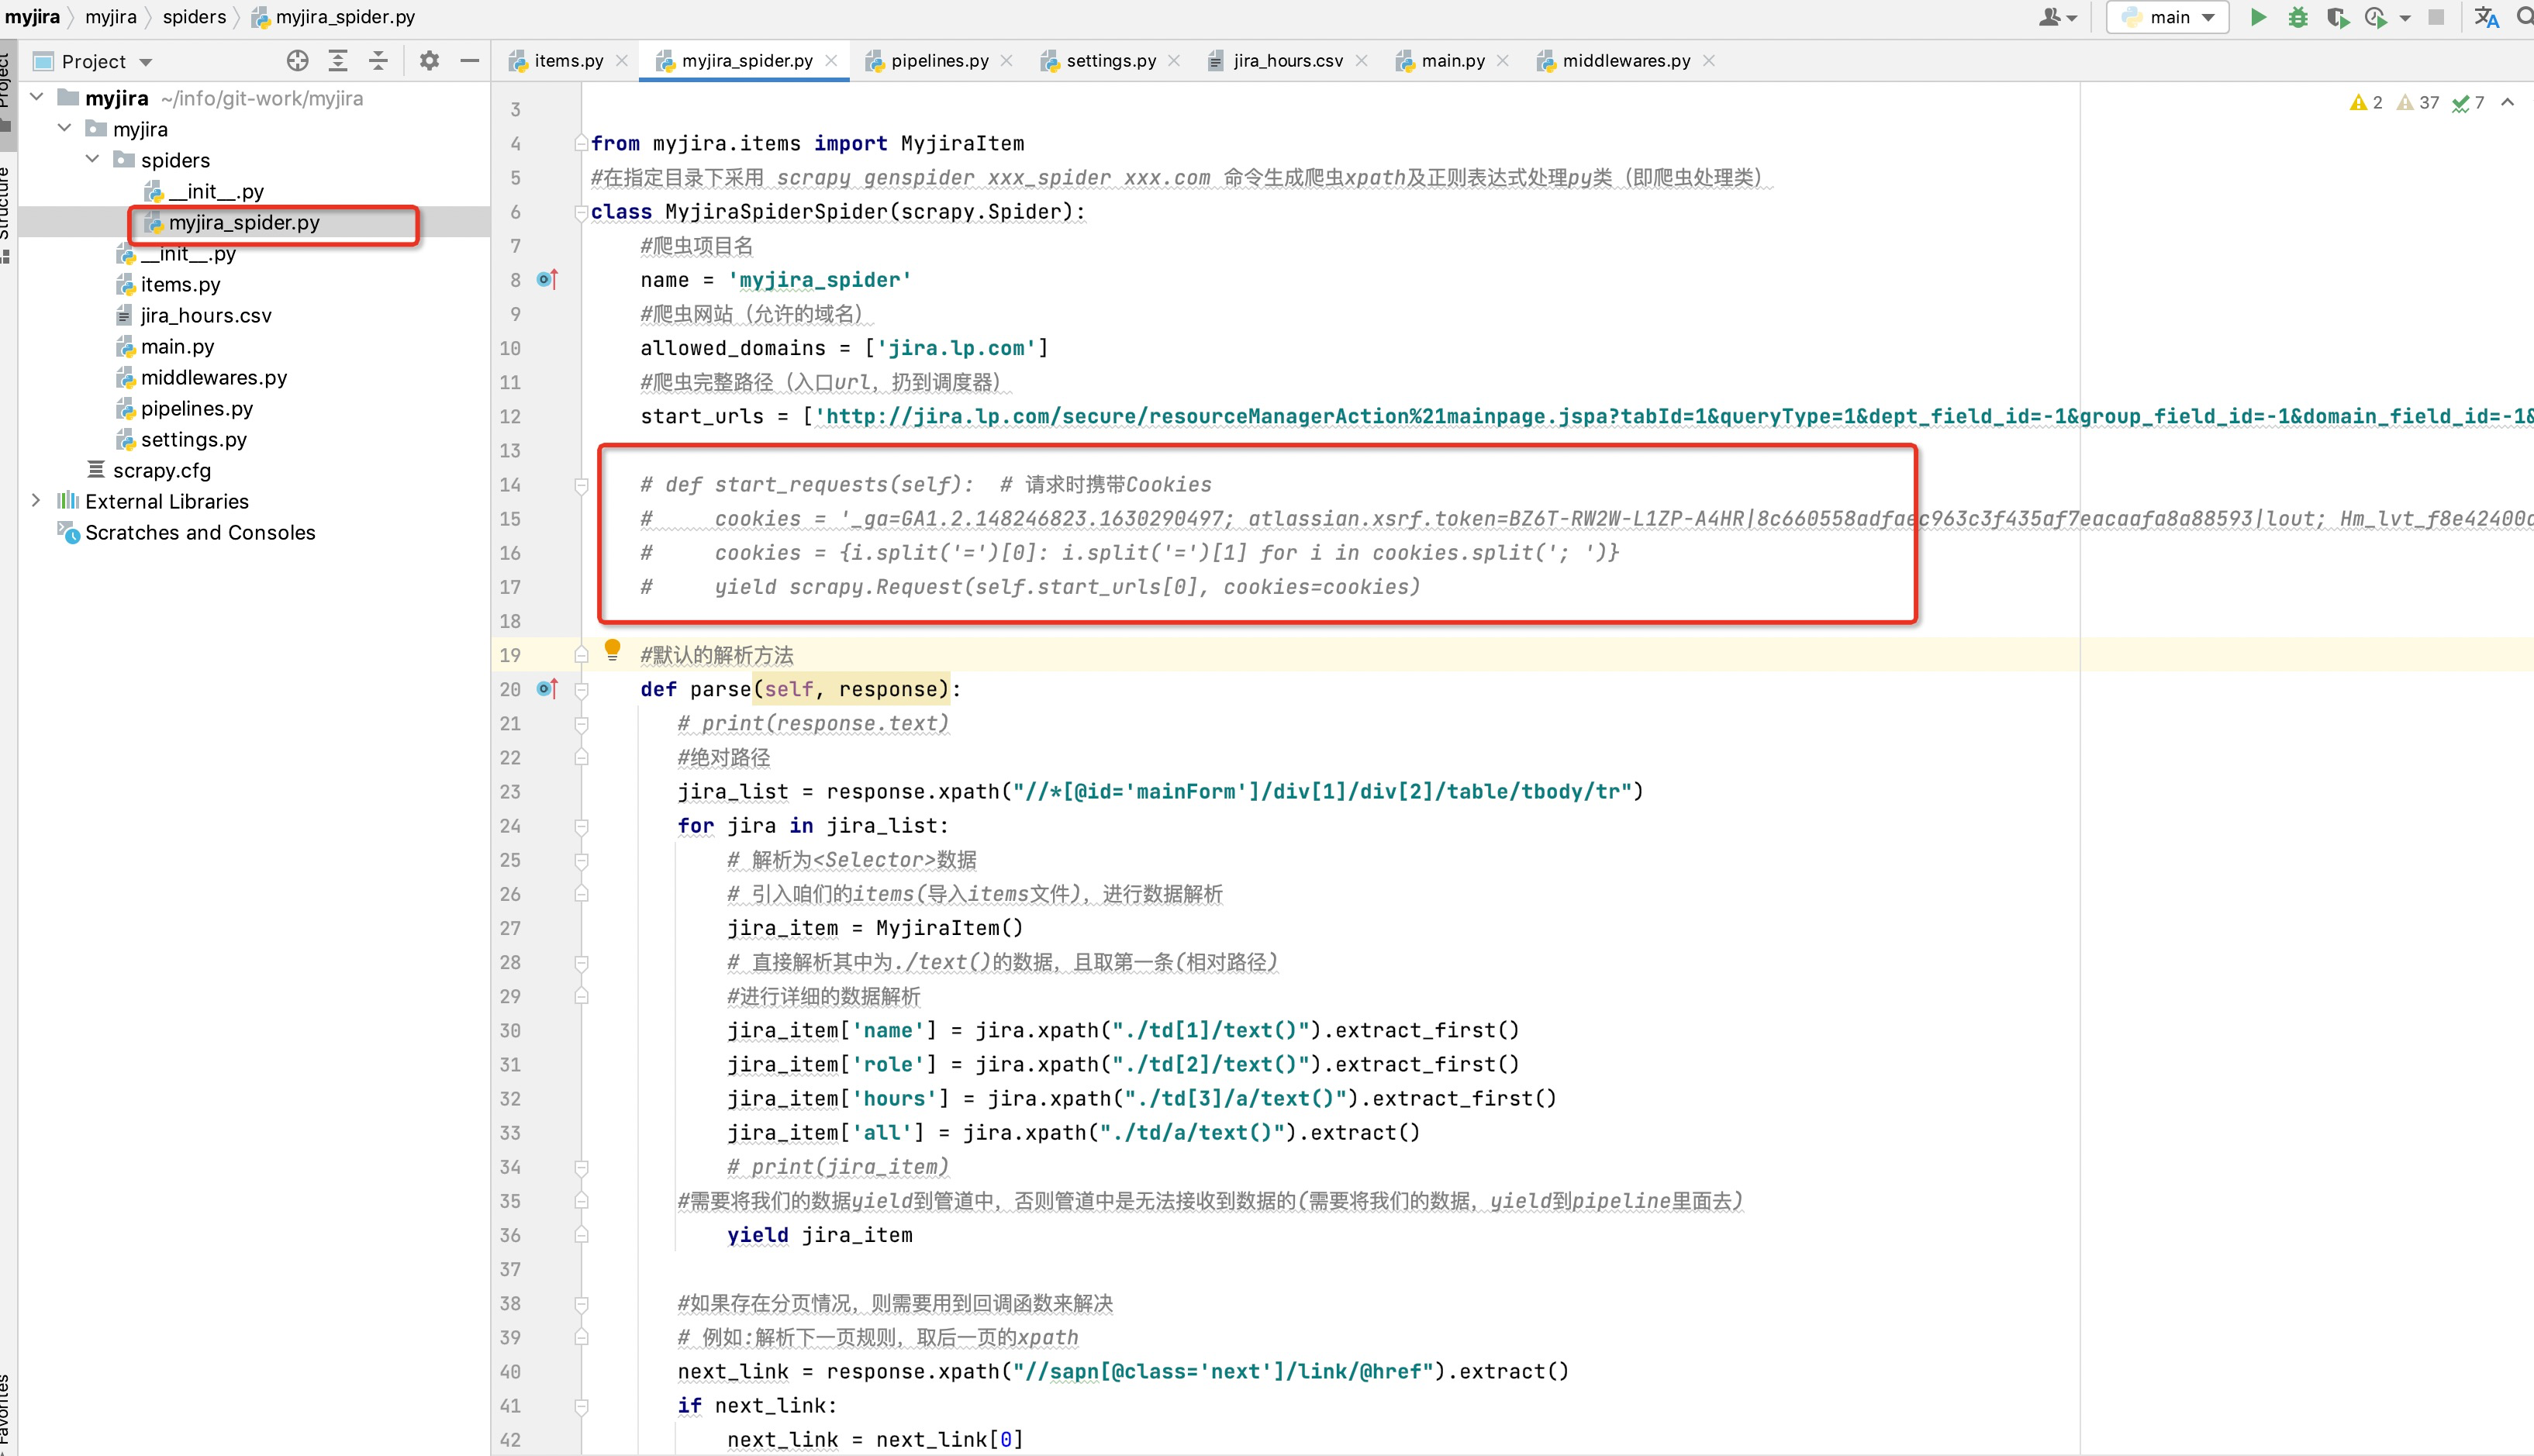
# def start_requests(self): # 请求时携带Cookies
# cookies = '_ga=GA1.2.148246823.1630290497; atlassian.xsrf.token=BZ6T-RW2W-L1ZP-A4HR|8c660558adfaec963c3f435af7eacaafa8a88593|lout; Hm_lvt_f8e42400dd4c16e4b8dc8e193c6adc34=1645606030,1646018701; Hm_lpvt_f8e42400dd4c16e4b8dc8e193c6adc34=1646019876; JSESSIONID=B7AA754F70315E04EFB0F652F13F6378'
# cookies = {i.split('=')[0]: i.split('=')[1] for i in cookies.split('; ')}
# yield scrapy.Request(self.start_urls[0], cookies=cookies)
#默认的解析方法
def parse(self, response):
# print(response.text)
#绝对路径
jira_list = response.xpath("//*[@id='mainForm']/div[1]/div[2]/table/tbody/tr")
for jira in jira_list:
# 解析为<Selector>数据
# 引入咱们的items(导入items文件),进行数据解析
jira_item = MyjiraItem()
# 直接解析其中为./text()的数据,且取第一条(相对路径)
#进行详细的数据解析
jira_item['name'] = jira.xpath("./td[1]/text()").extract_first()
jira_item['role'] = jira.xpath("./td[2]/text()").extract_first()
jira_item['hours'] = jira.xpath("./td[3]/a/text()").extract_first()
jira_item['all'] = jira.xpath("./td/a/text()").extract()
# print(jira_item)
#需要将我们的数据yield到管道中,否则管道中是无法接收到数据的(需要将我们的数据,yield到pipeline里面去)
yield jira_item
#如果存在分页情况,则需要用到回调函数来解决
# 例如:解析下一页规则,取后一页的xpath
next_link = response.xpath("//sapn[@class='next']/link/@href").extract()
if next_link:
next_link = next_link[0]
yield scrapy.Request('http://xxx/xxx'+next_link,callback=self.parse())
2.3 编写pipelines.py文件
这里是管道文件,就是我们采集到的数据通过yield信号,传递到这里,进行后续操作,比如存入数据库,写文件…
import json

class MyjiraPipeline(object):
    #初始化的操作,这里我们做本地化直接写成文件,所以初始化文件对象
    def __init__(self):
        print('实例化MyjiraPipeline')
        self.f = open('myjira.json','w',encoding='utf-8')

    def process_item(self, item, spider):
        content = json.dumps(dict(item))
        self.f.write(content)
        print(content)
        return item
    #结束后做的操作,在这里我们要关闭文件
    def close_spider(self,spider):
        print('结束')
        self.f.close()
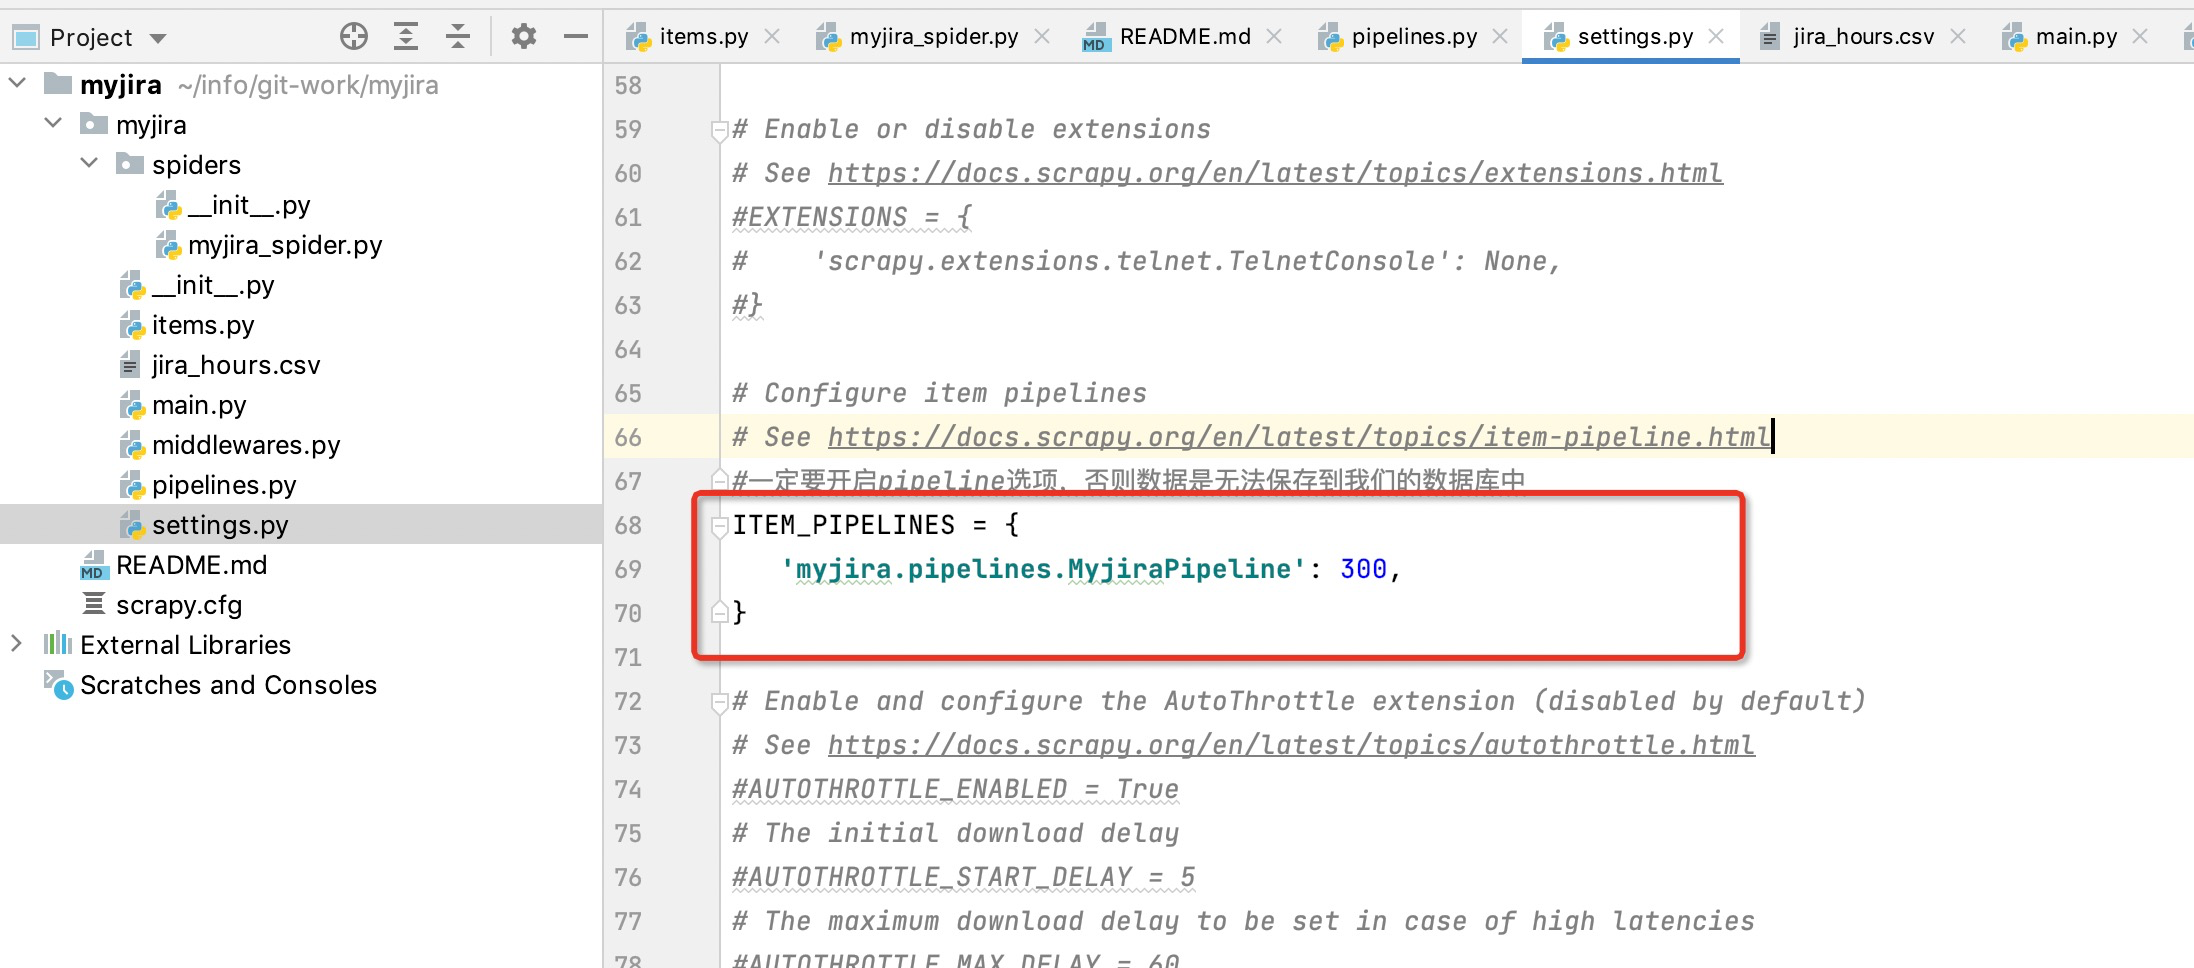
2.4 打开settings.py 文件更改配置
启用管道文件(一定要开启pipeline选项,否则数据是无法保存到我们的数据库中)
3.运行项目
到这里,恭喜你已经写完了第一个scrapy 分布式爬虫的项目,是不是so easy !
方式一:
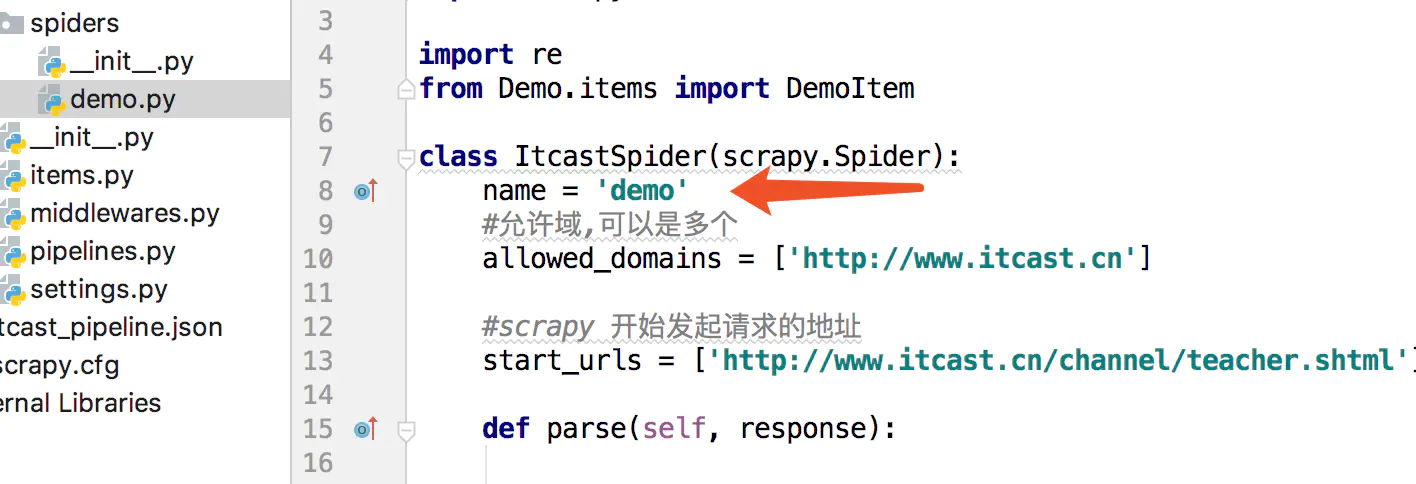
执行程序: scrapy crawl myjira_spider
这里的demo 是 下图中的
方式二:
此处可改用新建main.py文件,实现cmdline命令进行入口方法执行即可
from scrapy import cmdline
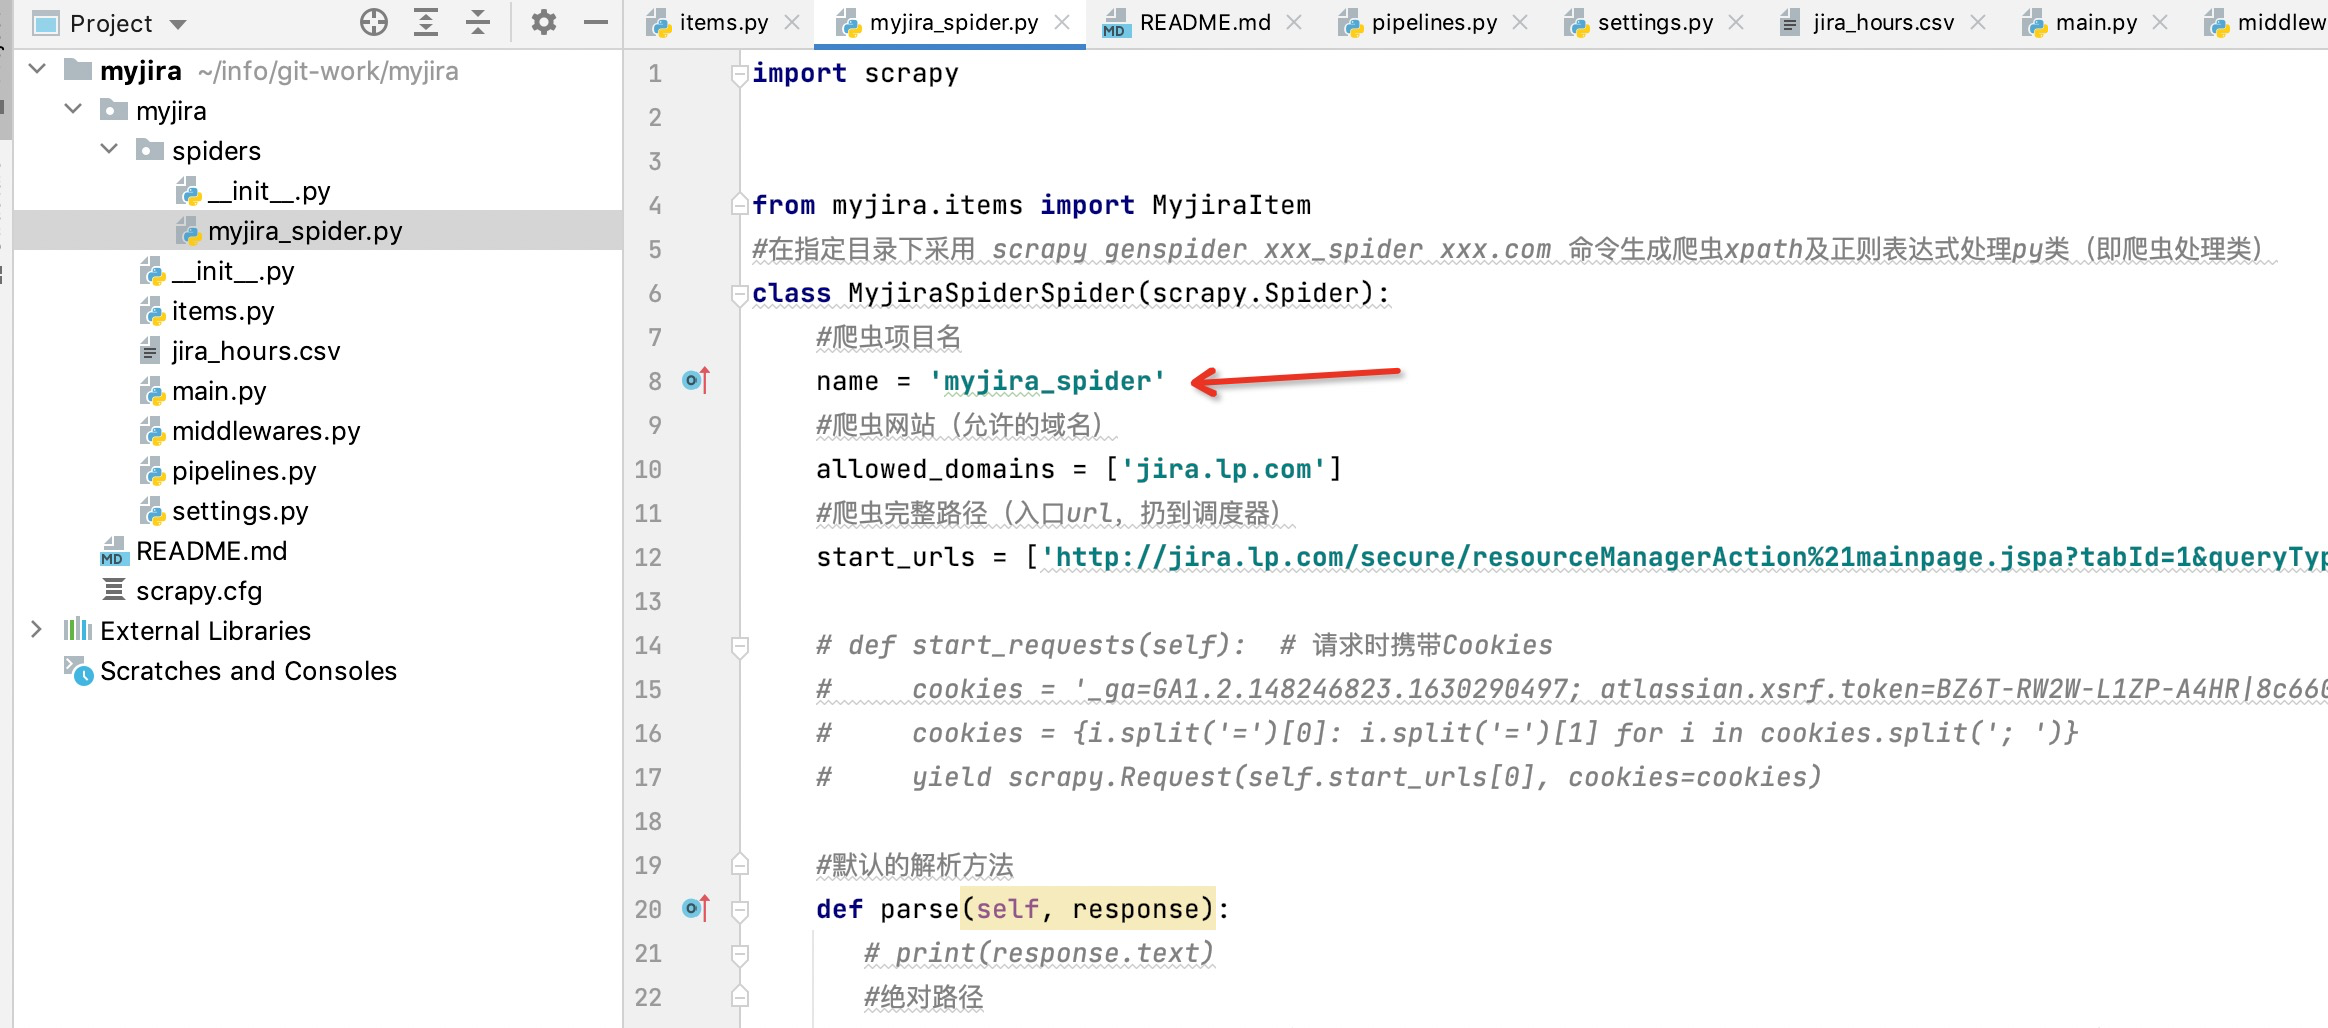
#此处xxx为项目中spiders文件夹下生成的项目文件名,例如下图中为:myjira_spider
cmdline.execute("scrapy crawl xxx".split())
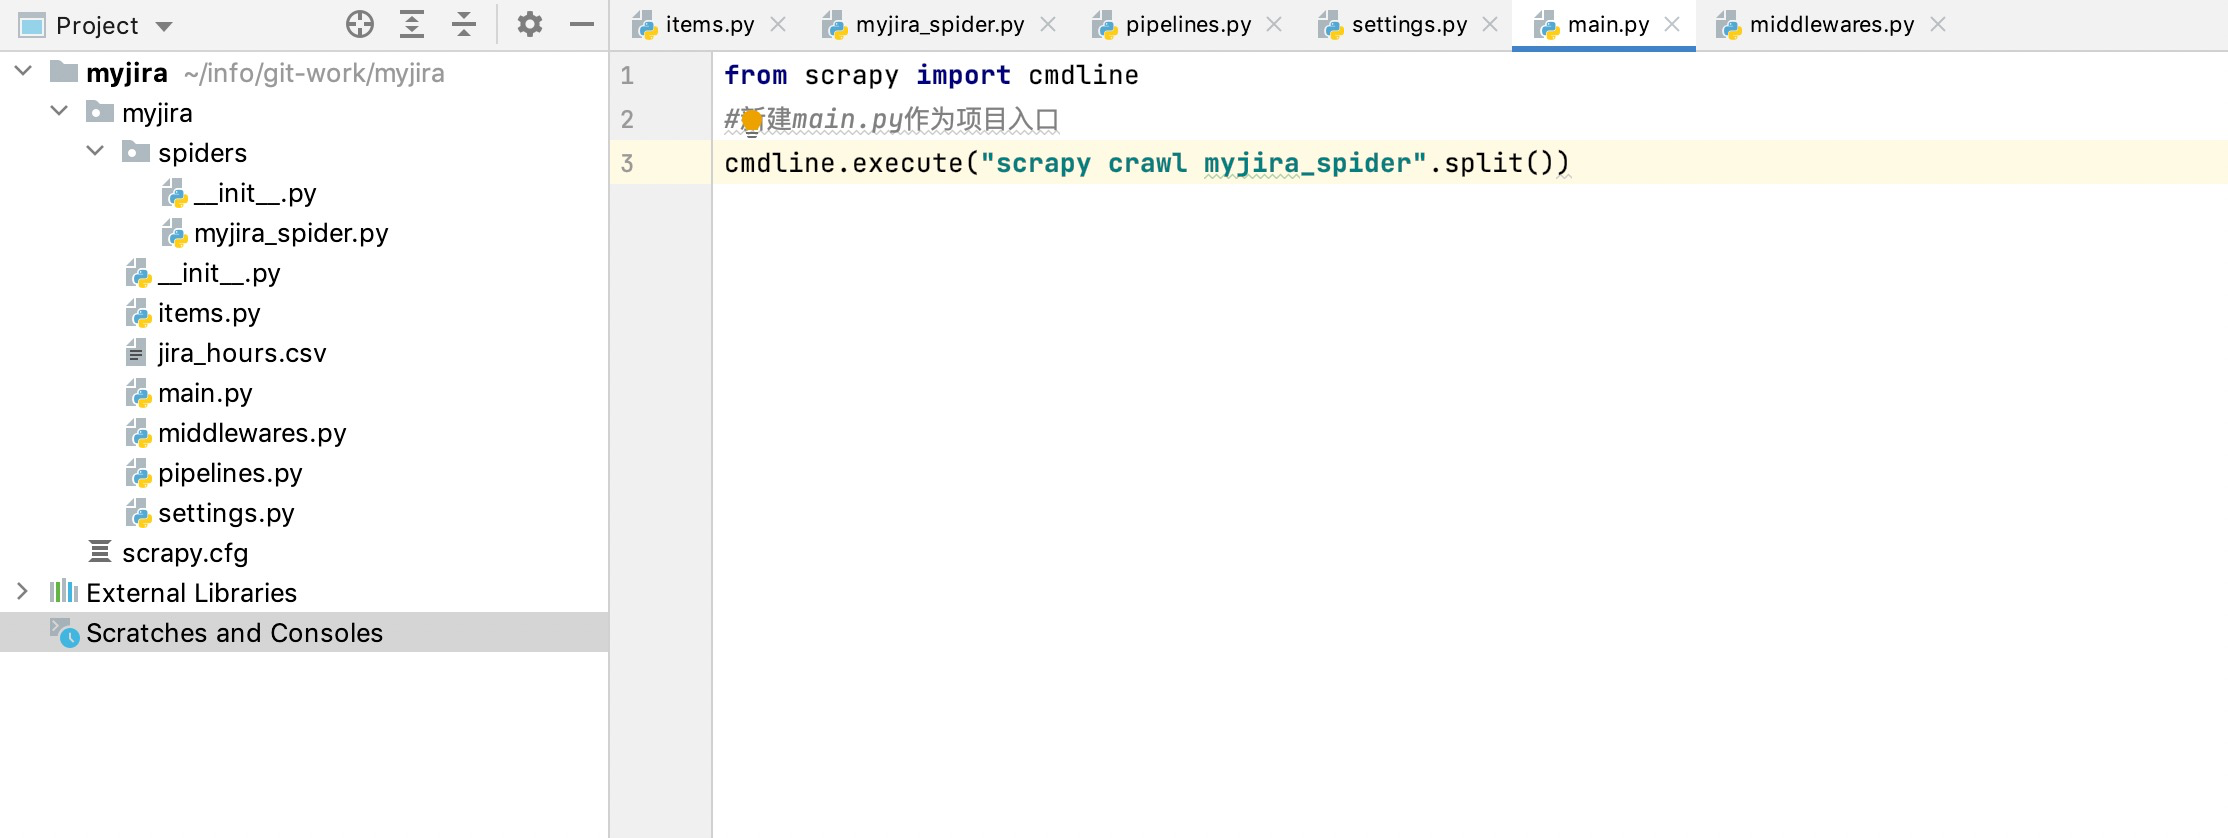
直接运行该main文件即可实现爬虫读取
扩展一:如何设置代理,防止被墙
如果咱们需要伪装咱们的user_agent,防止被服务端探查屏蔽,可以使用如下方式实现:
1、采用代理ip方式实现(先得买代理服务器,麻烦)
2、采用user-agent方式实现
不过2种方式比较类似,主要讲解下采用第2种方式的方法
步骤1:
在middlewares.py文件中新增user-agent处理伪装类
middlewares.py文件核心就是做爬虫的中间操作
步骤2:
定义user-agent代理伪装类:
#useragent伪装类
class my_useragent(object):
    def process_request(self,request,spider):
        USER_AGENT_LIST = [
            "Mozilla/5.0 (Windows NT 10.0; Win64; x64) AppleWebKit/537.36 (KHTML, like Gecko) Chrome/75.0.3770.142 Safari/537.36",
            "Mozilla/4.0 (compatible; MSIE 8.0; Windows NT 5.1; Trident/4.0; GTB7.0)",
            "Mozilla/4.0 (compatible; MSIE 7.0; Windows NT 5.1)",
            "Mozilla/4.0 (compatible; MSIE 6.0; Windows NT 5.1; SV1)",
            "Mozilla/5.0 (Windows; U; Windows NT 6.1; ) AppleWebKit/534.12 (KHTML, like Gecko) Maxthon/3.0 Safari/534.12",
            "Mozilla/4.0 (compatible; MSIE 7.0; Windows NT 6.1; WOW64; Trident/5.0; SLCC2; .NET CLR 2.0.50727; .NET CLR 3.5.30729; .NET CLR 3.0.30729; Media Center PC 6.0; InfoPath.3; .NET4.0C; .NET4.0E)",
            "Mozilla/4.0 (compatible; MSIE 7.0; Windows NT 6.1; WOW64; Trident/5.0; SLCC2; .NET CLR 2.0.50727; .NET CLR 3.5.30729; .NET CLR 3.0.30729; Media Center PC 6.0; InfoPath.3; .NET4.0C; .NET4.0E; SE 2.X MetaSr 1.0)",
            "Mozilla/5.0 (Windows; U; Windows NT 6.1; en-US) AppleWebKit/534.3 (KHTML, like Gecko) Chrome/6.0.472.33 Safari/534.3 SE 2.X MetaSr 1.0",
            "Mozilla/5.0 (compatible; MSIE 9.0; Windows NT 6.1; WOW64; Trident/5.0; SLCC2; .NET CLR 2.0.50727; .NET CLR 3.5.30729; .NET CLR 3.0.30729; Media Center PC 6.0; InfoPath.3; .NET4.0C; .NET4.0E)",
            "Mozilla/5.0 (Windows NT 6.1) AppleWebKit/535.1 (KHTML, like Gecko) Chrome/13.0.782.41 Safari/535.1 QQBrowser/6.9.11079.201",
            "Mozilla/4.0 (compatible; MSIE 7.0; Windows NT 6.1; WOW64; Trident/5.0; SLCC2; .NET CLR 2.0.50727; .NET CLR 3.5.30729; .NET CLR 3.0.30729; Media Center PC 6.0; InfoPath.3; .NET4.0C; .NET4.0E) QQBrowser/6.9.11079.201",
            "Mozilla/5.0 (compatible; MSIE 9.0; Windows NT 6.1; WOW64; Trident/5.0)",
            "Mozilla/5.0(Macintosh;U;IntelMacOSX10_6_8;en-us)AppleWebKit/534.50(KHTML,likeGecko)Version/5.1Safari/534.50",
            "Mozilla/5.0(Windows;U;WindowsNT6.1;en-us)AppleWebKit/534.50(KHTML,likeGecko)Version/5.1Safari/534.50",
            "Mozilla/5.0(compatible;MSIE9.0;WindowsNT6.1;Trident/5.0;",
            "Mozilla/4.0(compatible;MSIE8.0;WindowsNT6.0;Trident/4.0)",
            "Mozilla/4.0(compatible;MSIE7.0;WindowsNT6.0)",
            "Mozilla/4.0(compatible;MSIE6.0;WindowsNT5.1)",
            "Mozilla/5.0(Macintosh;IntelMacOSX10.6;rv:2.0.1)Gecko/20100101Firefox/4.0.1",
            "Mozilla/5.0(WindowsNT6.1;rv:2.0.1)Gecko/20100101Firefox/4.0.1",
            "Opera/9.80(Macintosh;IntelMacOSX10.6.8;U;en)Presto/2.8.131Version/11.11",
            "Opera/9.80(WindowsNT6.1;U;en)Presto/2.8.131Version/11.11",
            "Mozilla/5.0(Macintosh;IntelMacOSX10_7_0)AppleWebKit/535.11(KHTML,likeGecko)Chrome/17.0.963.56Safari/535.11",
            "Mozilla/4.0(compatible;MSIE7.0;WindowsNT5.1;Maxthon2.0)",
            "Mozilla/4.0(compatible;MSIE7.0;WindowsNT5.1;TencentTraveler4.0)",
            "Mozilla/4.0(compatible;MSIE7.0;WindowsNT5.1)",
            "Mozilla/4.0(compatible;MSIE7.0;WindowsNT5.1;TheWorld)",
            "Mozilla/4.0(compatible;MSIE7.0;WindowsNT5.1;Trident/4.0;SE2.XMetaSr1.0;SE2.XMetaSr1.0;.NETCLR2.0.50727;SE2.XMetaSr1.0)",
            "Mozilla/4.0(compatible;MSIE7.0;WindowsNT5.1;360SE)",
            "Mozilla/4.0(compatible;MSIE7.0;WindowsNT5.1;AvantBrowser)",
            "Mozilla/4.0(compatible;MSIE7.0;WindowsNT5.1)"
        ]
        USER_AGENT = random.choice(USER_AGENT_LIST)
        request.headers['USER_Agent'] = USER_AGENT

步骤3:
settings.py文件中开启useragent伪装类
#开启useragent伪装类
DOWNLOADER_MIDDLEWARES = {
   # 'myjira.middlewares.MyjiraDownloaderMiddleware': 543,
   'myjira.middlewares.my_useragent': 543,
}
扩展二:如何设置cookie,防止需要登录后才能爬虫
咱们直接在核心爬虫类中新增start_request(self)方法进行携带cookie操作
def start_requests(self):  # 请求时携带Cookies
    cookies = '_ga=GA1.2.148246823.1630290497; atlassian.xsrf.token=BZ6T-RW2W-L1ZP-A4HR|8c660558adfaec963c3f435af7eacaafa8a88593|lout; Hm_lvt_f8e42400dd4c16e4b8dc8e193c6adc34=1645606030,1646018701; Hm_lpvt_f8e42400dd4c16e4b8dc8e193c6adc34=1646019876; JSESSIONID=B7AA754F70315E04EFB0F652F13F6378'
    cookies = {i.split('=')[0]: i.split('=')[1] for i in cookies.split('; ')}
    yield scrapy.Request(self.start_urls[0], cookies=cookies)
最后,项目被我开源到github上:https://github.com/HongYan789/myjira
scrapy视频可查看:https://www.imooc.com/learn/1017
文章借鉴:https://www.jianshu.com/p/8d81aa6cfc76
结束
总结一下scrapy 项目没什么,记住四步走
第一步:编写items.py
第二步:编写spiders下的 demo.py 文件
第三步:编写pipelines.py文件
第四步:打开settings.py 文件更改配置
作者:朱允见
链接:https://www.jianshu.com/p/8d81aa6cfc76
来源:简书
著作权归作者所有。商业转载请联系作者获得授权,非商业转载请注明出处。