声明:初学scrapy,总结学习内容。
目录
一、安装scrapy
二、创建工程
三、编写代码
3.1 item文件编写
3.1 spider文件编写
3.2 pipeline文件编写
3.3 setting文件修改
四、测试
一、安装scrapy
pip install scrapy
二、创建工程
scrapy startproject hellospider                 #创建scrapy工程hellospider
cd hellospider                                  #进入工程目录
scrapy genspider hellospider2 baidu.com      #创建爬虫(spider名不能与project名相同,因此本人命名为hellospider2)
三、编写代码
3.1 item文件编写
items用于存储字段的定义。即爬取的内容存与item类中。
本人由于需要抓取百度贴吧的帖子标题、帖子作者、帖子回复数,因此定义下述3个字段
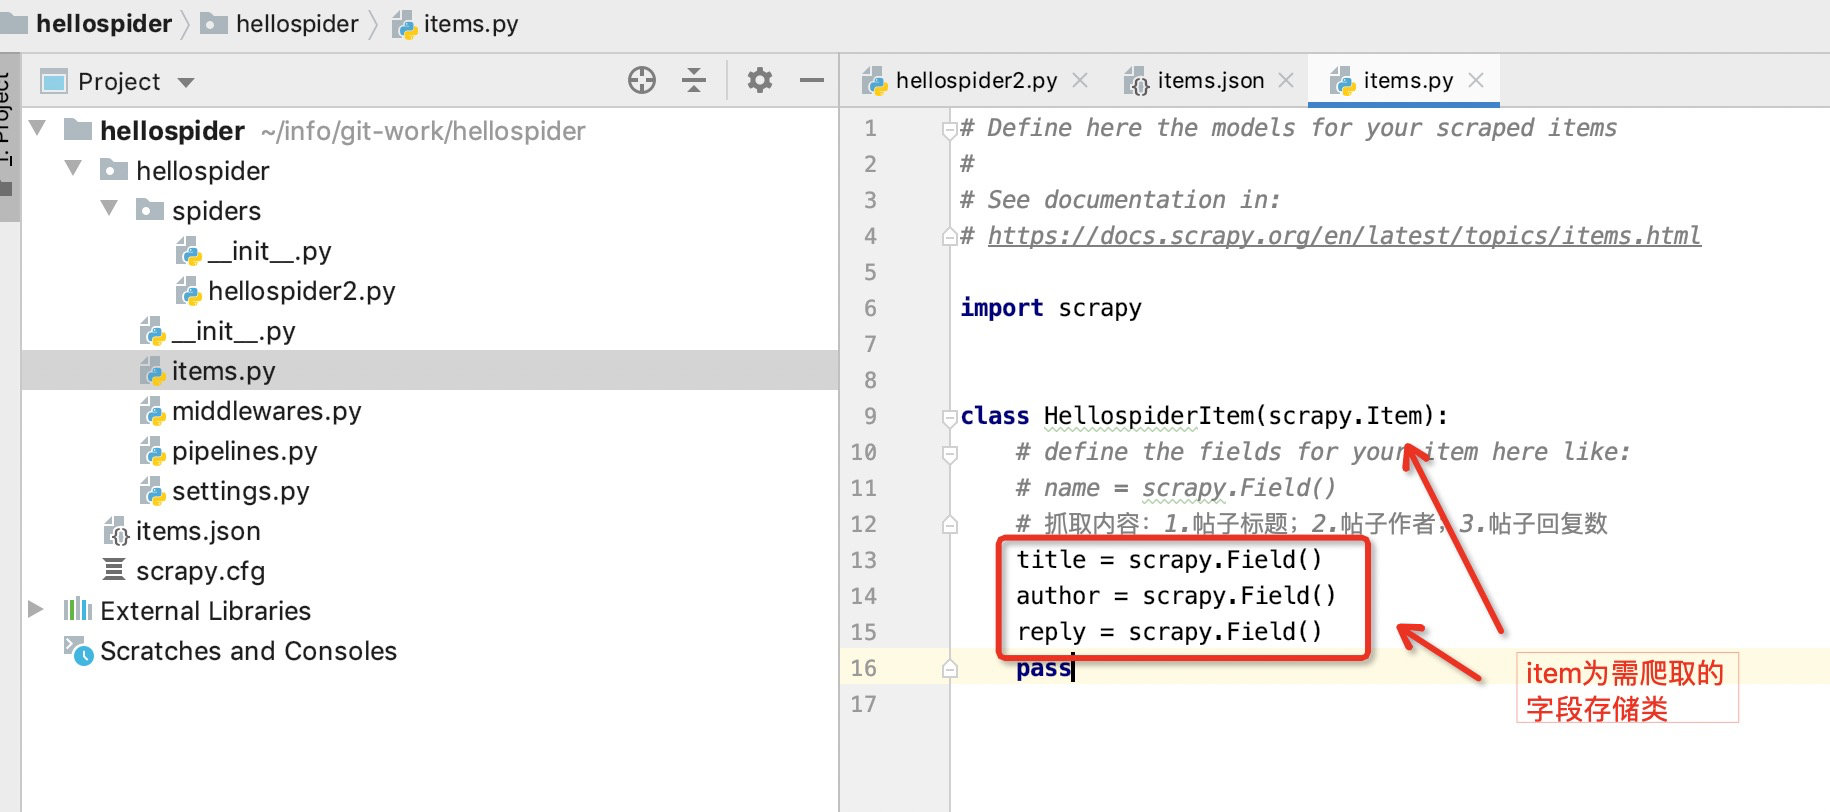
import scrapy

class HellospiderItem(scrapy.Item):
    # define the fields for your item here like:
    # name = scrapy.Field()
    # 抓取内容:1.帖子标题;2.帖子作者;3.帖子回复数
    title = scrapy.Field()
    author = scrapy.Field()
    reply = scrapy.Field()
    pass
项目目录结构:
scrapy.cfg: 项目的配置文件
hellospider/: 该项目的python模块。之后您将在此加入代码。
hellospider/items.py:需要提取的数据结构定义文件。
hellospider/middlewares.py: 是和Scrapy的请求/响应处理相关联的框架。
hellospider/pipelines.py: 用来对items里面提取的数据做进一步处理,如保存等。
hellospider/settings.py: 项目的配置文件。
hellospider/spiders/: 放置spider代码的目录,通过scrapy genspider命令生成对应的文件代码,即图中hellospider2.py文件。
3.1 spider文件编写
通过上述scrapy genspider hellospider2 baidu.com命令生成具体爬虫文件:hellospider2.py
通过xpath方式将具体字段属性值返回给item包装类
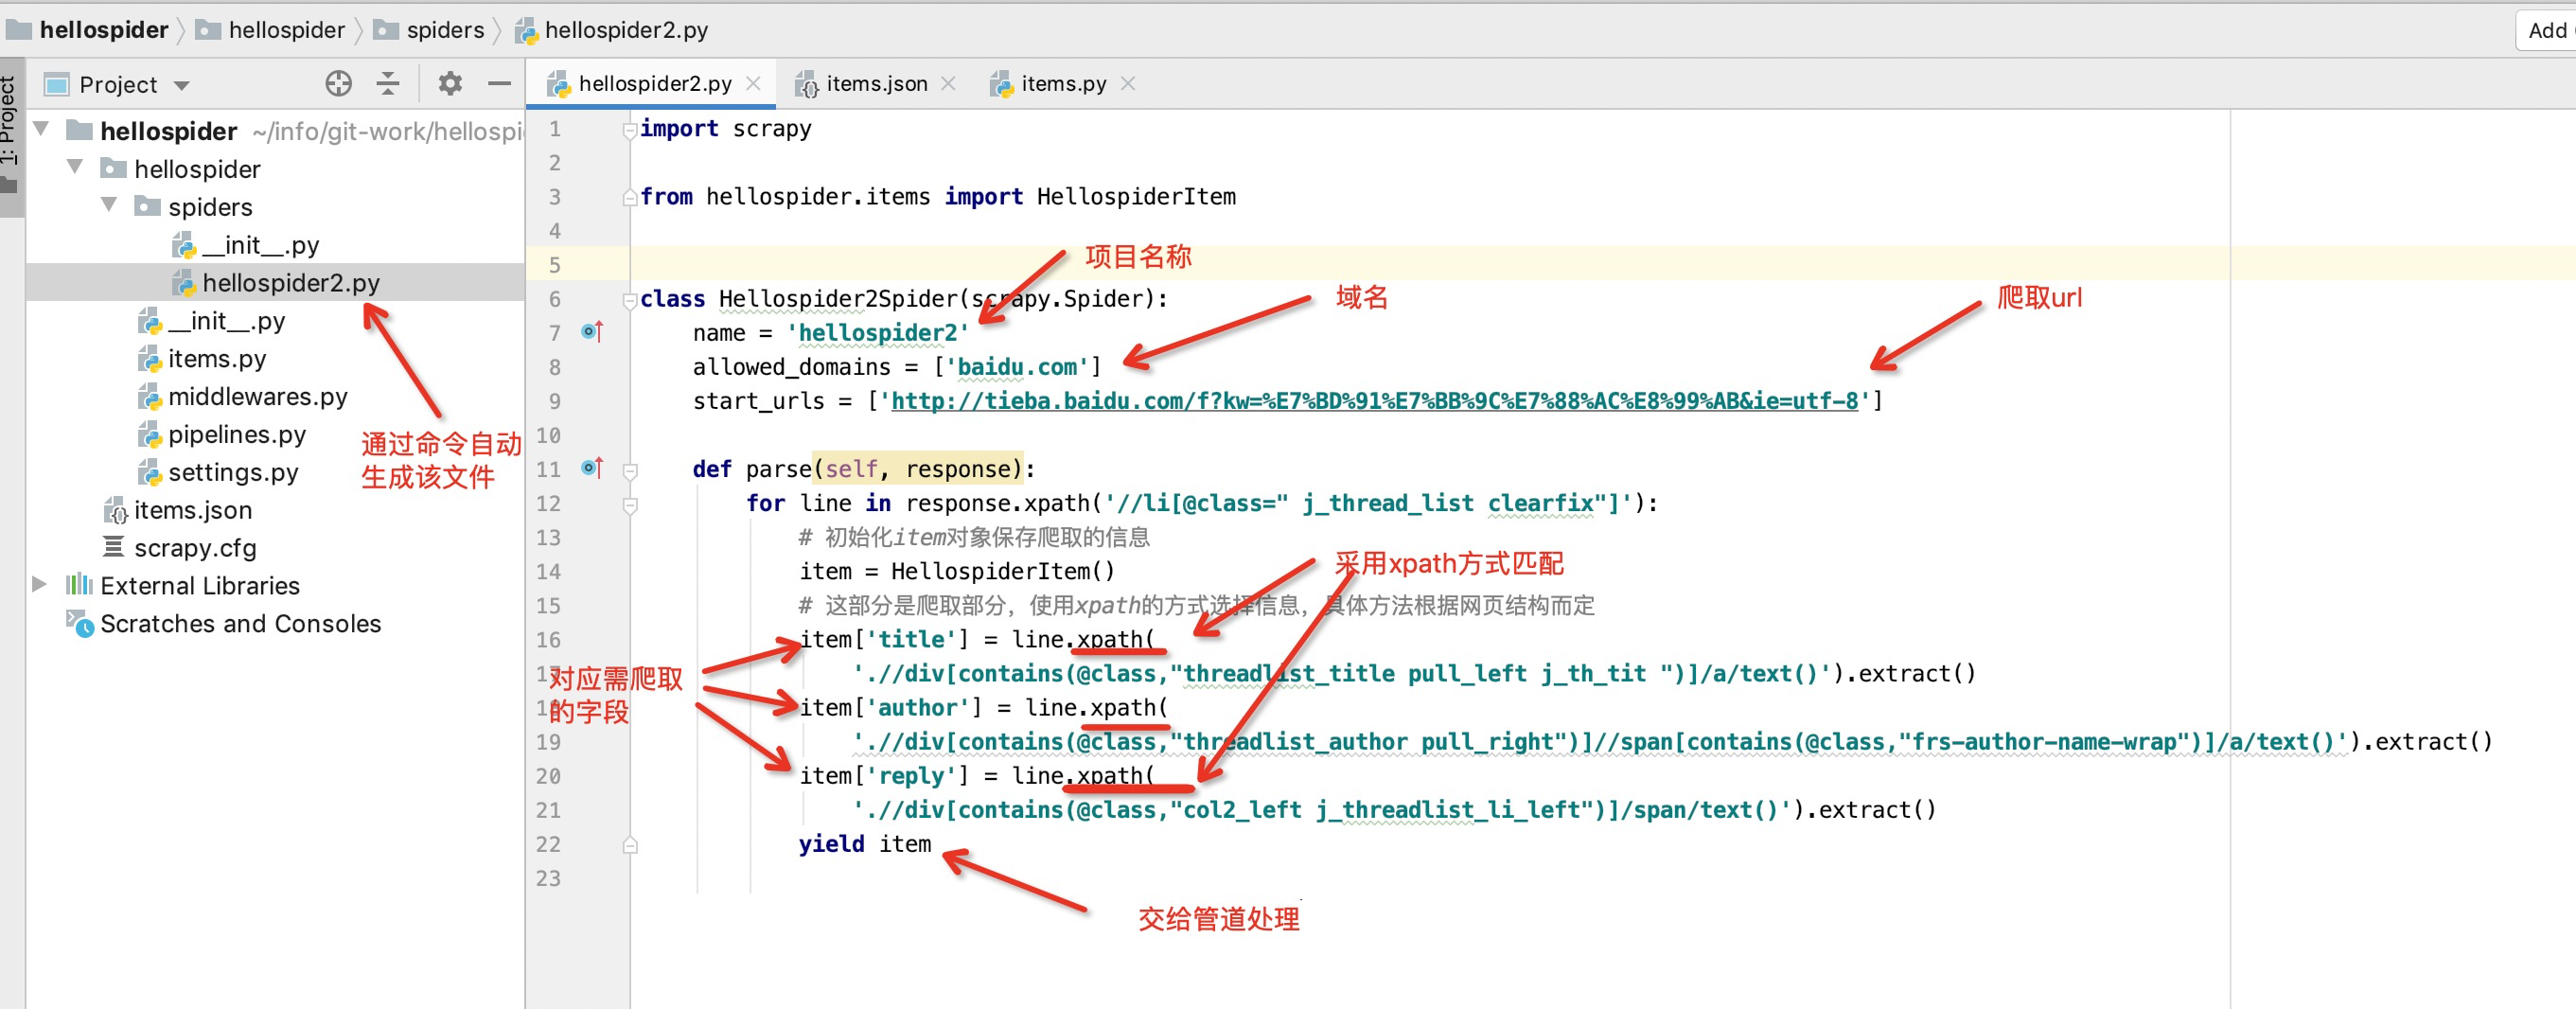
import scrapy

from hellospider.items import HellospiderItem


class Hellospider2Spider(scrapy.Spider):
    name = 'hellospider2'
    allowed_domains = ['baidu.com']
    start_urls = ['http://tieba.baidu.com/f?kw=%E7%BD%91%E7%BB%9C%E7%88%AC%E8%99%AB&ie=utf-8']

    def parse(self, response):
        for line in response.xpath('//li[@class=" j_thread_list clearfix"]'):
            # 初始化item对象保存爬取的信息
            item = HellospiderItem()
            # 这部分是爬取部分,使用xpath的方式选择信息,具体方法根据网页结构而定
            item['title'] = line.xpath(
                './/div[contains(@class,"threadlist_title pull_left j_th_tit ")]/a/text()').extract()
            item['author'] = line.xpath(
                './/div[contains(@class,"threadlist_author pull_right")]//span[contains(@class,"frs-author-name-wrap")]/a/text()').extract()
            item['reply'] = line.xpath(
                './/div[contains(@class,"col2_left j_threadlist_li_left")]/span/text()').extract()
            yield item
上述是采用的xpath方式实现获取数据节点,咱们其实可以采用css class的方式获取节点数据,比较推荐这种方式,操作简单
借鉴:https://blog.csdn.net/dangsh_/article/details/78617178
http://www.scrapyd.cn/doc/146.html
https://www.pianshen.com/article/48991159193/
import scrapy

from hellospider.items import HellospiderItem


class Hellospider2Spider(scrapy.Spider):
    name = 'hellospider2'
    allowed_domains = ['baidu.com']
    start_urls = ['http://tieba.baidu.com/f?kw=%E7%BD%91%E7%BB%9C%E7%88%AC%E8%99%AB&ie=utf-8']

    def parse(self, response):
    for line in response.css('div.t_con.cleafix'):
        item = TestspiderItem()
        item["title"] = line.css('div.threadlist_title.pull_left.j_th_tit  a.j_th_tit::text').extract_first()
        item["author"] = line.css('a.frs-author-name.j_user_card::text').extract_first()
        item["reply"] = line.css('span.threadlist_rep_num.center_text::text').extract_first()
        yield item
【注】xpath语法可参考:http://www.w3school.com.cn/xpath/xpath_syntax.asp
【注】:我们可以通过命令进入scrapy shell:
scrapy shell http://tieba.baidu.com/f?kw=网络爬虫&ie=utf-8
来方便的查看我们xpath代码所获得的结果,以便调试。

3.2 pipeline文件编写
pipeline文件用于存储到文件中。
具体看情况,本人项目不需要存储到数据库或者文件中,因此不做调整(附图不准,看看就行)

3.3 setting文件修改
其他配置暂且不用修改,只修改pipeline配置。
修改pipeline配置:
#机器人协议,选择false,要不然有些网站页面爬不了,不强制设置
ROBOTSTXT_OBEY = False
#开启pipeline管道,一般必须开启
ITEM_PIPELINES = {
   'testSpider.pipelines.TestspiderPipeline': 300,
}
#事件间隔,最好设置一下,要不然可能会被服务器认定为机器调用,导致被墙
DOWNLOAD_DELAY = 1
#不开启cookie,不记得哪篇文章介绍的了,不强制设置
COOKIES_ENABLED = False
#切记,本人不知道为什么,设置了User-Agent后反而获取不到数据了,所以还是得慎用
#设置请求头,一般吧user-agent设置一下即可,不强制设置
DEFAULT_REQUEST_HEADERS = {
  'Accept': 'text/html,application/xhtml+xml,application/xml;q=0.9,*/*;q=0.8',
  'Accept-Language': 'en',
  'User-Agent':'Mozilla/5.0 (Windows NT 6.2; WOW64) AppleWebKit/537.36 (KHTML, like Gecko) Chrome/27.0.1453.94 Safari/537.36'
}
#设置请求头,感觉效果同DEFAULT_REQUEST_HEADERS类似,不强制设置
USER_AGENT = 'Mozilla/5.0 (Windows NT 6.2; WOW64) AppleWebKit/537.36 (KHTML, like Gecko) Chrome/27.0.1453.94 Safari/537.36'
修改 settings 中的 ROBOTSTXT_OBEY = True 参数为 False,因为默认为 True,就是要遵守 robots.txt 的规则, robots.txt 是遵循 Robot协议 的一个文件,它保存在网站的服务器中,它的作用是,告诉搜索引擎爬虫,本网站哪些目录下的网页不希望你进行爬取收录。在 Scrapy 启动后,会在第一时间访问网站的 robots.txt 文件,然后决定该网站的爬取范围。查看 robots.txt 可以直接网址后接 robots.txt 即可。
四、测试
scrapy crawl xxxProjectName #运行爬虫
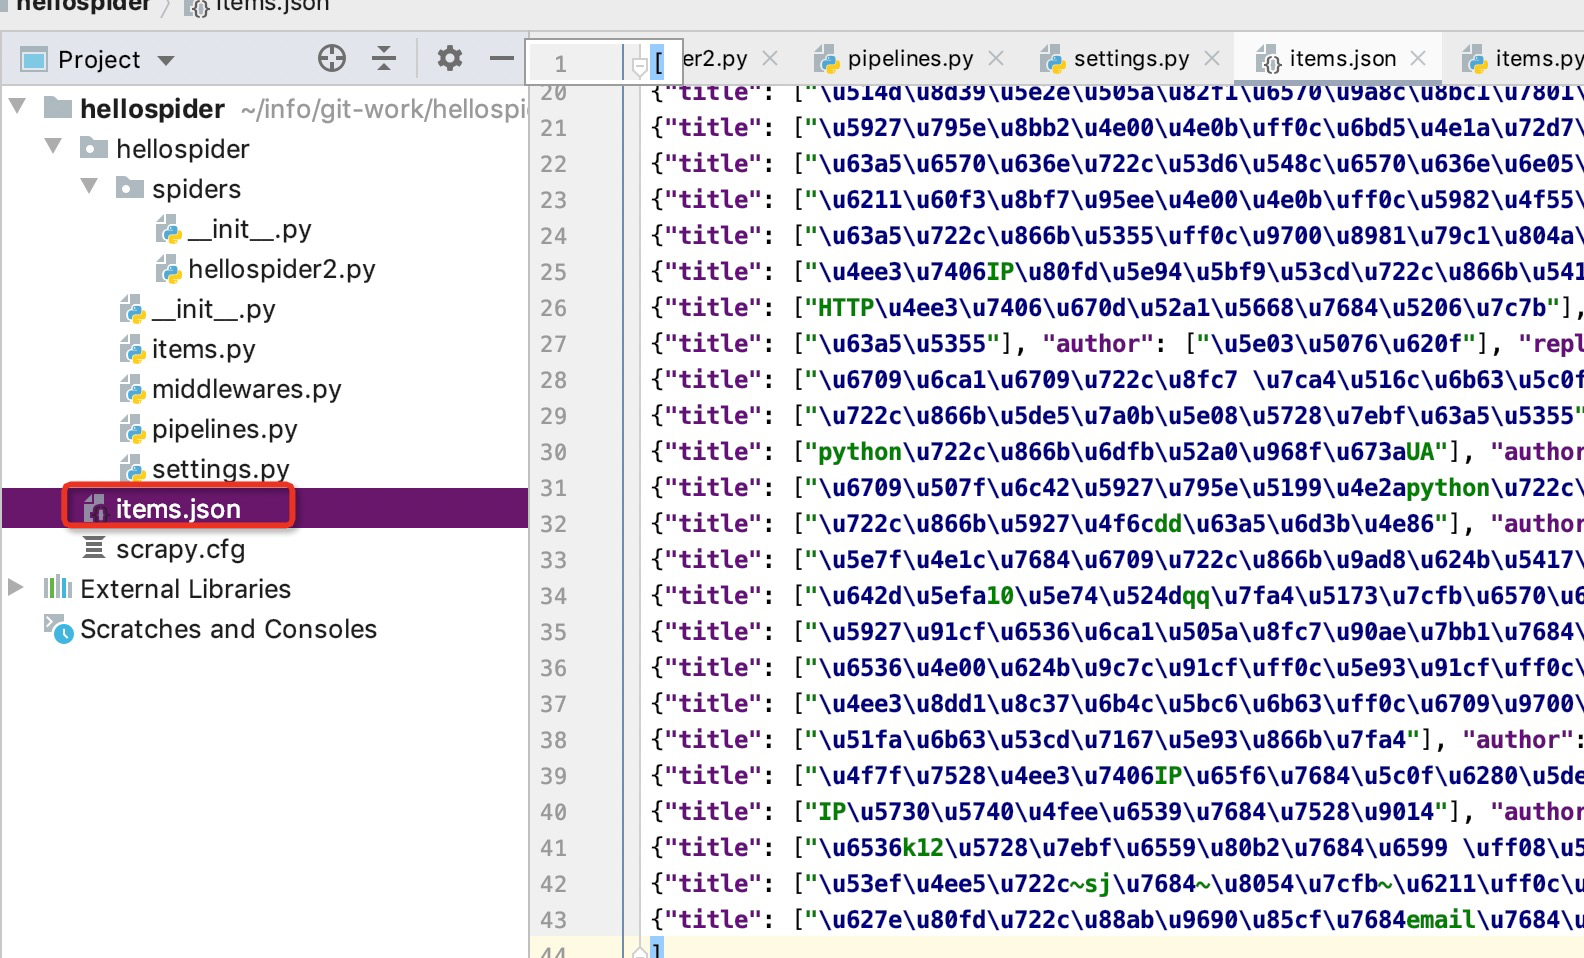
由于第二步中我们在文件hellospider2.py下定义了 name =“hellospider2” ,所以执行命令:scrapy crawl hellospider2 -o items.json。 -o 指定文件。
这样我们就会看到此目录下生成了items.json文件
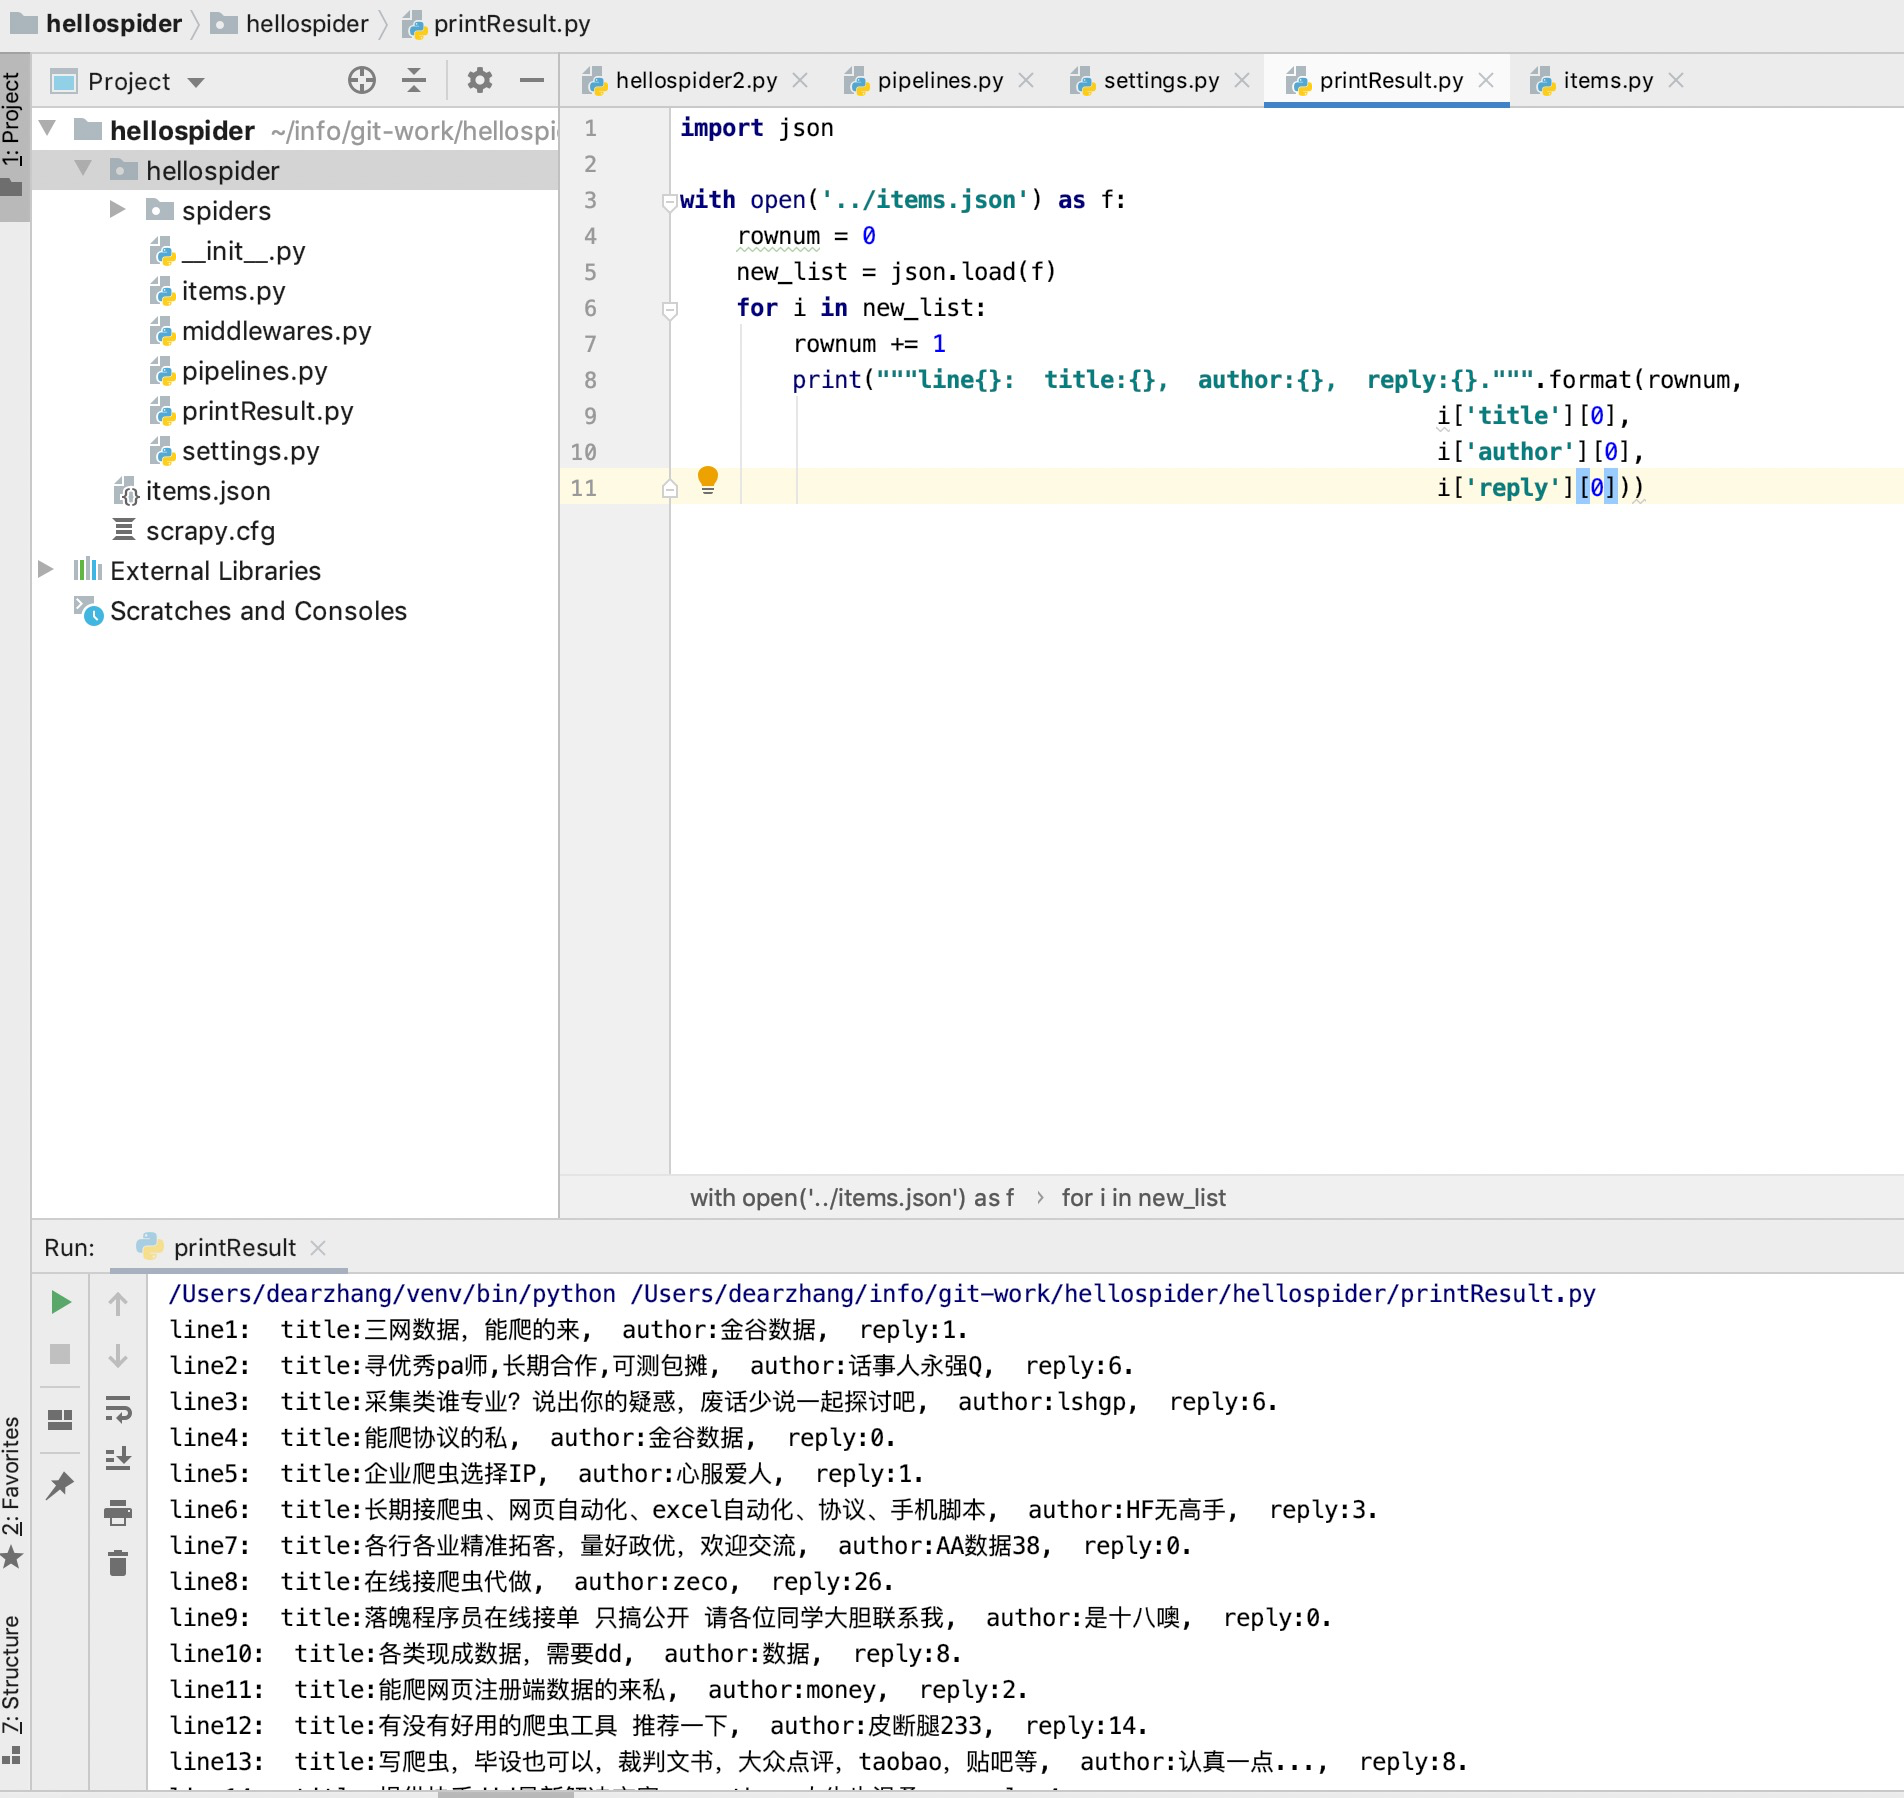
新建一个py文件,用于读取json返回的结果,并查看数据
import json

with open('../items.json') as f:
    rownum = 0
    new_list = json.load(f)
    for i in new_list:
        rownum += 1
        print("""line{}:  title:{},  author:{},  reply:{}.""".format(rownum,
                                                      i['title'][0],
                                                      i['author'][0],
                                                      i['reply'][0]))
如果采用的css模式中进行的extract_first数据返回,则数据无需额外处理,直接打印值即可,无需xxxx[0]
import json

with open('../items.json') as f:
    rownum = 0
    new_list = json.load(f)
    for i in new_list:
        rownum += 1
        print("""line{}:  title:{},  author:{},  reply:{}.""".format(rownum,
             i['title'],
             i['author'],
             i['reply']))
scrapy爬虫框架好是好,但是却不能下断点,这样的话,在咱们获取不到数据结果时无从下手,只能干瞪眼,因此研究了下如何在scrapy中实现debug操作呢?具体有2种方案,见下方借鉴文档,本人实现的是在与scrapy.cfg同级处增加一个main.py文件,并启动main方法,再对应item文件中卡断点即可
from scrapy import cmdline
from scrapy.cmdline import execute
import os
import sys

if __name__ == '__main__':
    # sys.path.append(os.path.dirname(os.path.abspath(__file__)))
    #method 1
    #执行main方法中execute命令,即可实现爬行news所在文件并存储到items.json文件中
    # execute(['scrapy','crawl','news'])
    #method 2
    #执行命令:scrapy crawl news -o items.json
    # -o  指定文件,这样我们就会看到此目录下生成了items.json文件
    cmdline.execute("scrapy crawl news -o items.json".split())
借鉴于:
scrapy之简单实例:
https://www.cnblogs.com/wumingxiaoyao/p/6183101.html
https://www.cnblogs.com/tinghai8/p/9700300.html
https://www.lmlphp.com/user/56/article/item/7623/
https://www.cnblogs.com/zhaojiedi1992/p/zhaojiedi_python_007_scrapy02.html
scrapy之debug调试和运行方式:https://www.cnblogs.com/I-love-Xiang/p/14143076.html